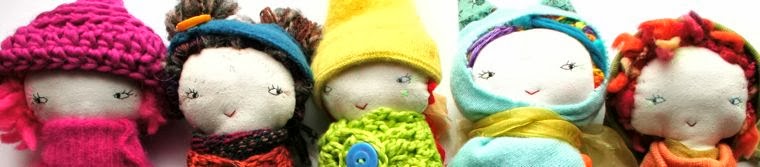
I have been wanting to make this post for far too long!
For so many reasons, but mainly to offer a little peek into my process -- and hopefully inspire you to try your hand at it too!
Below I will walk you through designing your basic rag or cloth doll, creating a pattern, sewing, assembling and finishing, using the same basic methods I do in creating my Little Lu and Willa dolls in my
shop. It's always fun to play around with creating new styles. I created a chubby little toddler dolly for this tutorial.
You don't have to be an expert seamstress or super talented to make lovely things for your kids (um... or yourself, or your friends!). They LOVE to watch you work and *birth* the dolly - giving their input and ideas along the way. You can adapt this (very) basic method to creating any number of dolls or other stuffed creatures.
Handmade gifts and toys are a treasure and really something special for your own family and friends!
Special skills needed:
Basic sewing: hand and machine sewing
Basic embroidery: knowing how to thread a needle and stitch
Basic crocheting: helpful, but not necessary
Basic sketching ability. Scribbles, really.
Basic tools and materials:
Thread and needle, embroidery floss
Yarn, fabric or felt for hair
Fabric, muslin or old linen shirt or skirt for doll body.
Crochet hook - for yarn haired doll
Dowel, stick or chopstick for turning and stuffing
Scissors - for cutting
STEP 1
Sketch out what you would like your dolly to look like. Does it have long, lanky legs? A round body? A big head, short arms? Feet or just points? Break it down into basic shapes. I basically use a circle or oval for the head with a triangular body. See below.
STEP 2
Flush out your design and make sure you have the proportions how you like them.
Measure your sketch and take note of the proportions. You are going to "blow it up" to the size you want your actual doll.
STEP 3
(maybe the tricky part?)
"Blow up" your dolly to make your pattern. In my example you can see the total doll height in sketch was about 3.5". I figured I want my doll about 18" or so tall.
I broke down the head/body, the arms and the legs. I scaled the drawing up, keeping the proportions.
You really do NOT have to be exact, but try to keep your lines straight - if you want a really perfect circle head (which I don't ever) you could trace something that is about the size you want the head.
This is your pattern so you want it to be almost the exact size that you picture the finished doll. You don't need to add any extra space for seams or anything at this point. Your doll will be slightly smaller as it becomes three-dimensional when you stuff it, so do take that into consideration.
Make sure to make it longer along the bottom of the head/body piece to allow fabric for tucking in if you want to do that (where you will attach the legs). Also extra length on the leg (at the top), for tucking it into the torso and extra length on the arm (at the top) for folding in and sewing to the body.
In the above photo you can see the leg, I guess I forgot to get a picture of the arm, but it is a basic slightly tapered rectangle. You want to make sure your legs will fit into the bottom of the torso. You can measure the opening if you want them to fit perfectly.
STEP 4
Laying out your pattern for sewing. I was pressed (heh heh) for time at this point of documentation and forewent the ironing of my muslin - but I think I did end up getting those wrinkles out before moving on. It's a good idea, although may seem annoying if you are a true artiste, like me (aka lazy?), but it's worth the little effort.
Lay your pattern pieces out on your fabric. Maybe you want to use different fabrics for the legs and arms? Or ears? !! :) Be creative, have fun!
Trace your pieces with a pencil, making sure they are not too close together. You will be cutting them out after you sew them, so there needs to be enough space to leave at least a 1/4" seam allowance around each piece. Obviously make sure you trace the legs and arms twice. Also ears, if you want them.
STEP 5
Take your nice, laid out and ironed and marked up fabric to your trusty (well oiled, of course) sewing machine and stitch lovingly along the lines, leaving the openings open.
You can pin the fabric in various places, if you feel so inclined. I never do.
STEP 6
Cut out your pieces, carefully. Make sure you don't cut too close to your stitches or you might have a seam burst while you are stuffing.
STEP 7
Turn your pieces inside out. I use a broken (not sharp or splintery) piece of dowel or a bluntish chop stick to help me with turning the arms and legs -- a bigger dowel is sometimes handy for the body/head. This step can be frustrating sometimes, especially if your dolly limbs are slender. Be patient and not too forceful - don't want to bust a seam at this point!
STEP 8
Stuff and assemble! You are almost done! Stuffing your doll IS a bit of an art in itself. Make sure you get your doll body nicely stuffed with even, not too-dense but not floppy/wrinkly either. I use polyester fiber fill usually, but wool also works great if you want something natural. There are plenty of great stuffings out there and different stuffings give a different feel to the doll. The fiber-fill is light and fluffy, wool is soft and dense, more substantial feeling.
Pin your legs in place. I have folded the extra fabric of the torso up into the body and tucked the extra fabric at the top of the legs up there too and pinned. It's easier to have quite a bit (1"?) of extra fabric to work with so things aren't slipping around and falling out.
I also folded the top of the arms in 'til they are the right length.
Then sew your legs on. This is the trickiest part of the sewing process. It helps if the body and legs are not stuffed too firmly all the way to where they meet. Go slowly and remove the pins as you come up to them so you don't break your machine!
I just stitch the arms on by hand. You can play around where you want your "shoulders". You can hide your knots in the armpit or right where the arm will be. Make sure to use a strong polyester thread and do lots of stitches - especially if you think a little one will be dragging this lovely by her arms all over the place. :)
STEP 9
Make your face! For this doll I kept it really simple, but the face and expressions are really endless. Just some simple lines for eyes is great - or slightly curved to suggest sleeping or blushing dolly. I made some little crochet cheeks but you can use felt or fabric scraps, or just embroidered solid circles, or simple outlines -- or nothing. You can "blush" them with some red crayola crayon.
One simple stitch for the mouth is sweet - or a few for a smile - or frown!
So many options!
Start your threads at the back of the head (which will be covered in hair) so you won't see the knots. Stitch through the head to the front to work on your face. Don't worry about getting it *perfect*.
Who wants perfect? The mistakes and imperfections are what gives it character!
Below you can see my knots and how I attached the ear. It's just a sem-circle folded a bit to look ear-like. It is stitched on after sewing the head and stuffing.
STEP 10
Hair can be done a number of ways. The way I do my dolls' hair, usually, is with a crochet "wig". This allows you to actually style the hair. My kids love to do hairstyles and braiding the hair is a big part of play and great fine-motor fun. Below you can see I just crochet a simple rectangle and stretch it over the head and stitch it in place all around the edge, then randomly around the surface to keep it flat.
If there are ears I tuck the ears through a hole so they look like they are poking out of the hair.
If you can't crochet you can use a scrap of cloth and stitch it down in a creative hair-do-ish way. There are lots of examples of this floating around - some really elegant beautiful dolls have "hair" like this. You could also probably find a mesh-like fabric at the fabric store that would be similar to the crochet web. You need something you can *hook* your yarn hair through.
You could also sew the yarn directly to the head. I have tried this in the past (many many moons ago) and I was far to impatient for it, but you might find it fun. It's easier if you lay your yarn across the head and stitch the "part" down the centre and then stitch the hair into a permanent do. Wool fleece and felt also work great. There are probably lots of other great ideas out there that I am forgetting, too.
After your wig base is attached you can use your crochet hood to pull a strand of yarn (cut to double the length you want your hair) by the middle, through a little loop, then pull the dangling strands through.
Hmmm, I am probably not describing that the best - but like how you would do fringe on a scarf. I didn't get any pics of me doing that either, unfortunately. You don't need to loop yarn through EVERY loop - I just try and make sure I loop most loops around the face and then sparsely over the rest of the head so it's not too heavy and thick.
Voila! Chubby Cheeky girl.
A sweet simple doll, made by you! I hope you enjoyed this and it was maybe helpful and slightly inspiring. A few skills and a bit of play and creativity and who knows what you will create! Share your pics of your own dollies with my on my facebook page!
Thank you!
I'll work on a little clothing-for-dollies tutorial soon.